Overview
- Track shares. Get full analytics about your website shares.
- GA dashboards support. Display data about all images sharing events inside your GA dashboard. Create any report view that you want.
Plugin has the option to track via Google Analytics all clicks on social buttons that were made on your site.
By default this option is disabled but if you installed Google Analytics on your site then you can enable it from the plugin settings page.

Google Analytics option
After you enable every click on the social button will be sent to your Google Analytics property. There you will be able to see all data about images sharing - number of shares, what images were shared and what social buttons were used.

Shares data inside Google Analytics dashboard
Next step is to properly configure GA property to receive and display Share This Image sharing events.
GA4: Start tracking share events
When you enable Google Analytics integration from the plugin settings page following custom events with parameters are sent with each image share:
Event name: sti_share
Event parameter:
sti_button - sharing button name
sti_image - URL of image that was shared
To view this event and its parameters inside GA4 dashboard first we need to properly configure this custom event tracking.
Steps to set-up sti_share custom event and its parameters:
1. Open your GA4 property admin page and then go to Events page.

Events admin page
2. Click Create Evens button and then create a new event with the following parameters:
event_name -> equals -> sti_share
Also make sure that checkbox Copy parameters from the source event are checked.
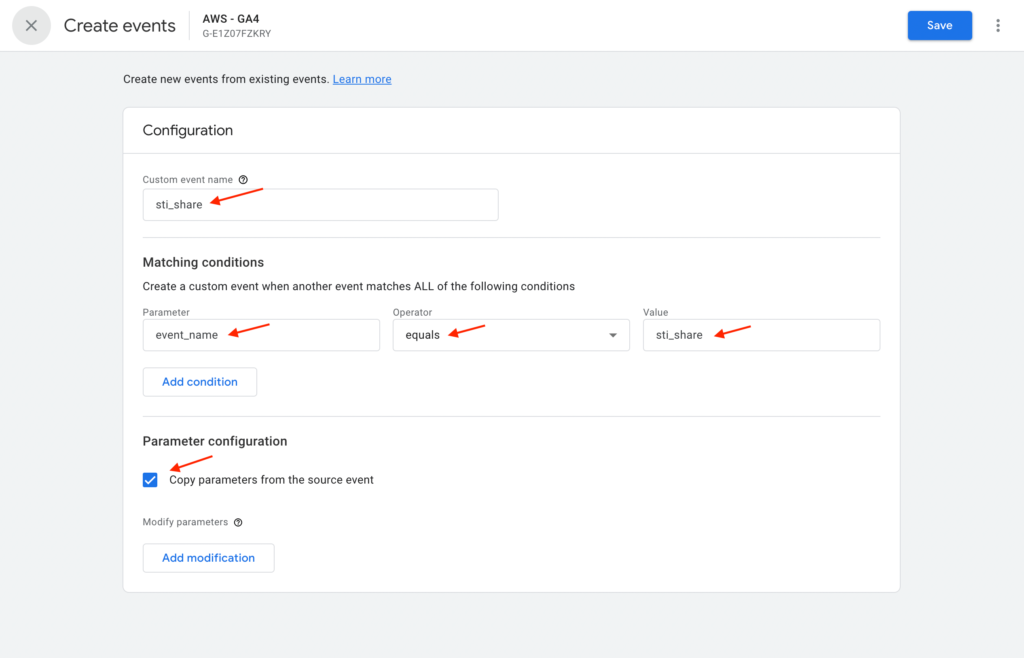
Create new sti_share event
After you are finished - click Save button.
3. Now we need to create two custom definitions to track values from event parameters sti_button and sti_image.
First open Custom Definitions page.
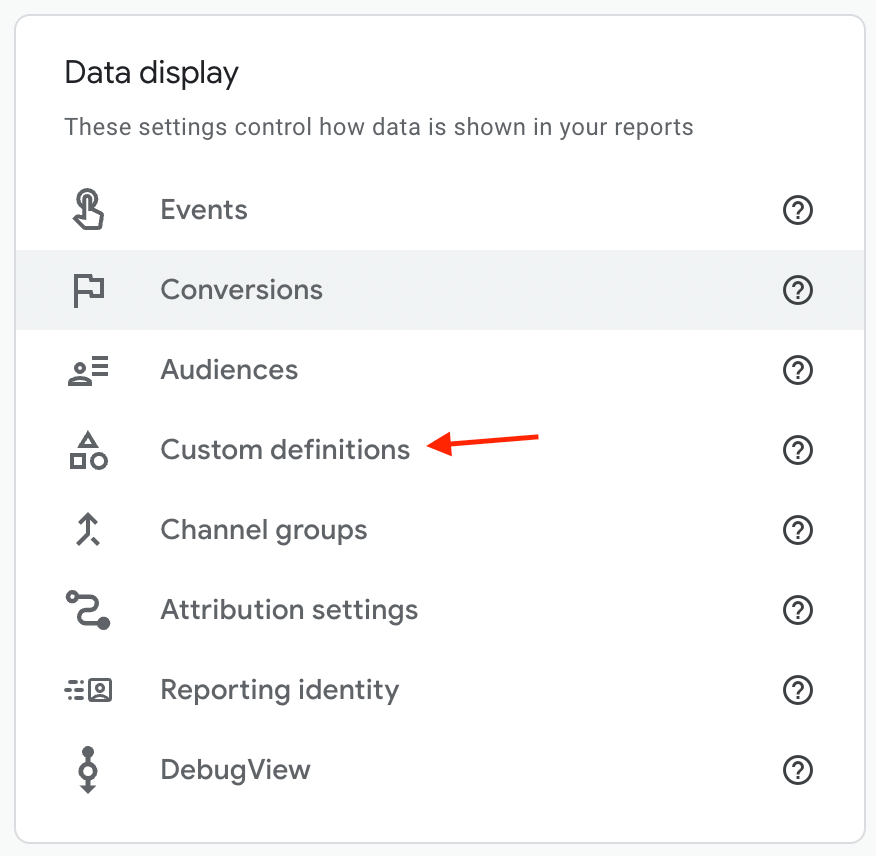
Custom Definitions admin page
4. Inside this page click Create custom dimension button.
Create a new dimension with the name sti_button, scope - Event and event parameter - sti_button. Then save all changes.
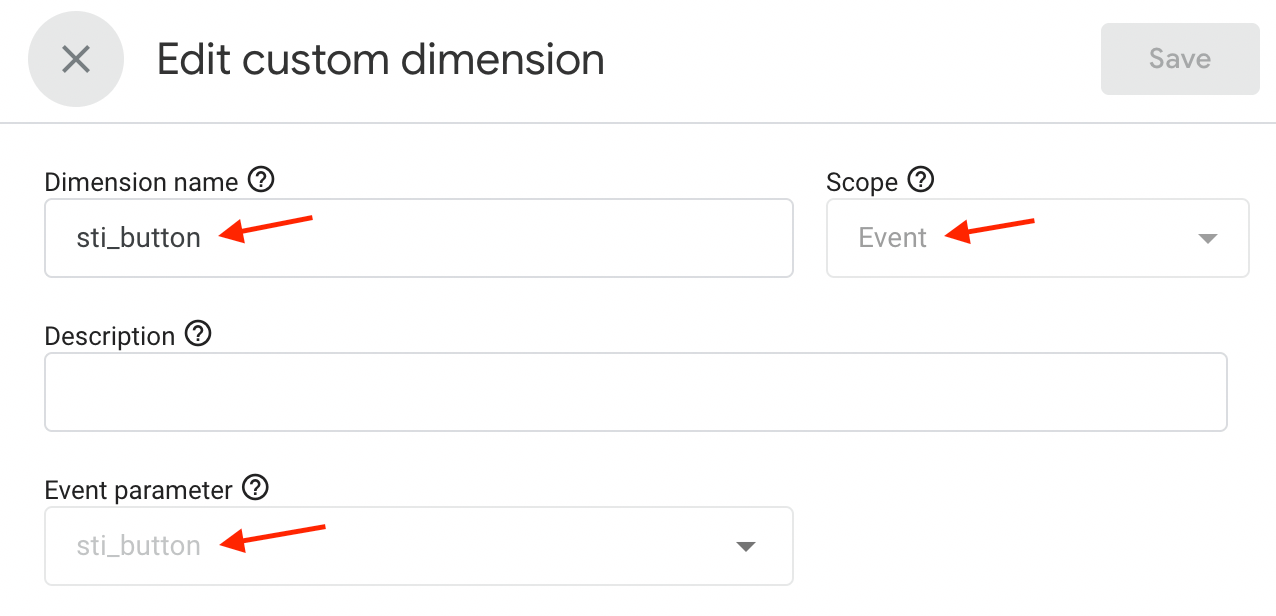
Creating a new custom dimension sti_button
Also create a second dimension with the name sti_image, scope - Event and event parameter - sti_image.
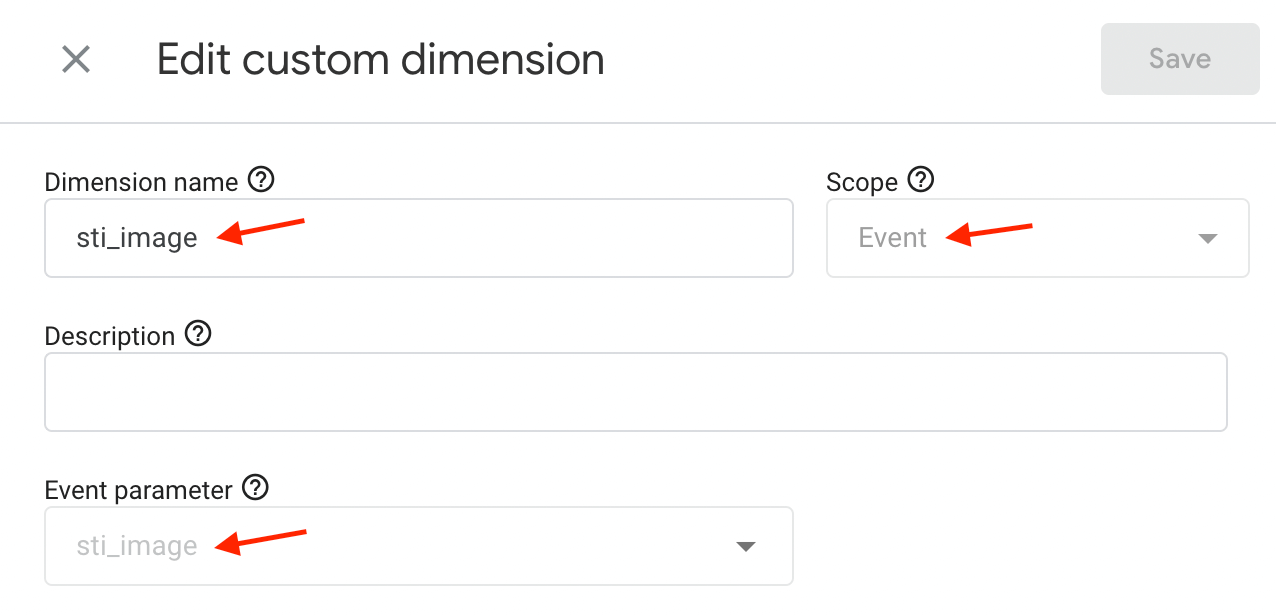
Creating a new custom dimension sti_image
5. We are done! Custom events and dimensions are properly set. Now we need to wait for 24 hours till Google Analytics accumulates new data.
Now we need to display these sharing data inside the GA4 dashboard. Learn how to do that in the next section.
GA4: View sharing events inside dashboard
So we properly set-up sti_share custom event tracking as well as tracking of its custom parameters sti_button and sti_image.
Now it is time to view this data inside the GA4 dashboard.
This can be done via 2 ways: inside default Events report or by creating custom events exploration.
Option 1: Events report
All custom events tracking can be found inside Engagement -> Events page.
Open this page, find the list of all available events and click on sti_share event to view all data related only to this particular event.
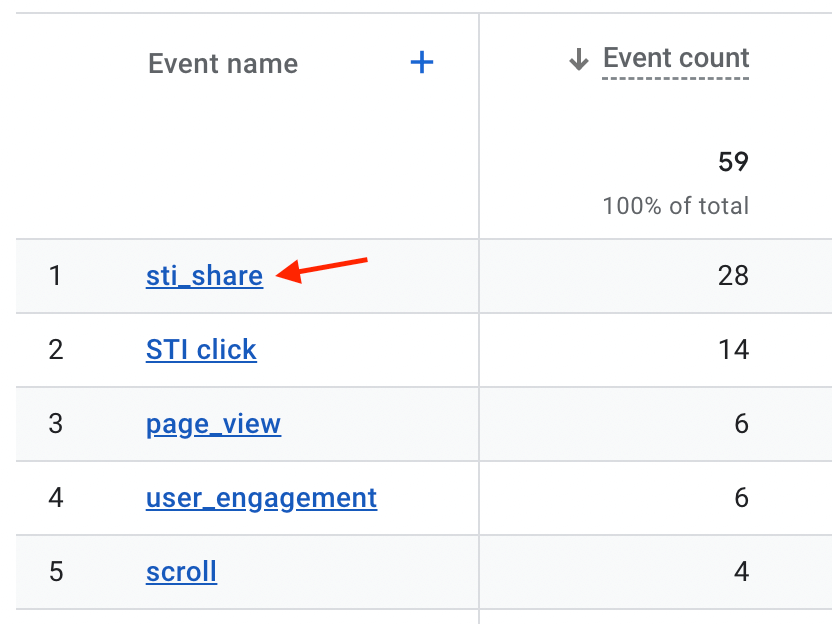
sti_share event inside Events page
Inside sti_share event page you can find event related data like total number of events, total number of users associated with this event, users country, etc. You can also select the time period for which you want to display the required information.
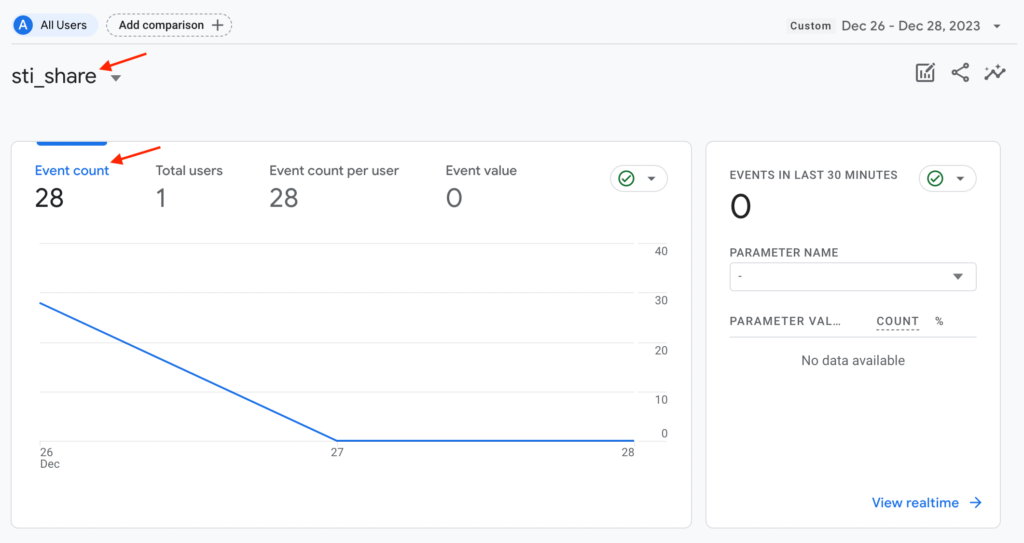
sti_share event page
At the bottom of this page you can find information about our custom dimensions - sti_button and sti_image. Here you can view what images and to what social networks were shared during a selected period of time.
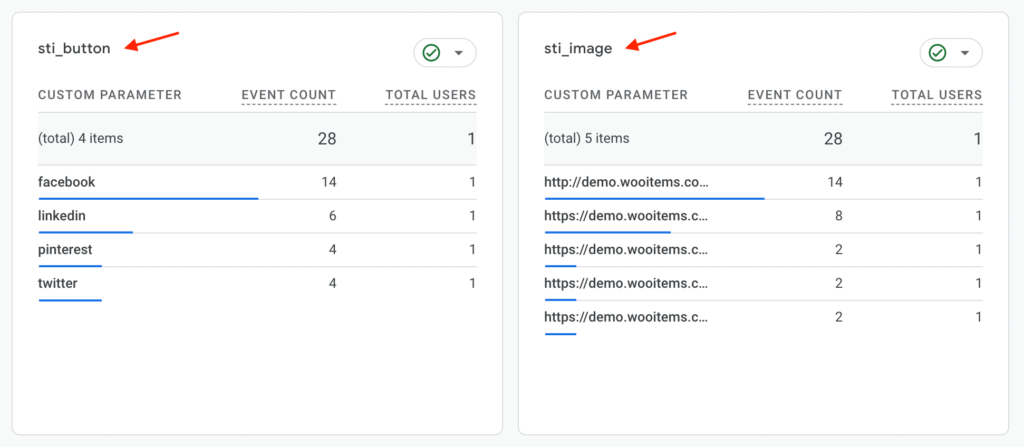
Custom dimensions related to sti_share event
So such a default Events page contains a large amount of useful information. In most cases, this information is quite sufficient. But if you need to build more advanced reports with additional details, custom charts, etc. then take a look on custom explorations.
Option 2: Custom events exploration
GA4 provides a feature to build fully custom reposts and represent any data inside them.
In this section we will cover how to create such a custom report for sti_share event and display sti_button, sti_image and total events number values inside it.
1. Go to the GA4 Explore page and create a new blank report.
2. Set the following variables for that report:
Dimensions - choose previously created sti_button and sti_image dimension.
Metrics - Choose Event count value.
Segments - create a segment that includes only sti_share events.
Then on the right tab ( settings ) for Rows option choose sti_button and sti_image values. And for the Values option choose Event count.
If everything is set up correctly - you will see a table with data about every image sharing event on your site.
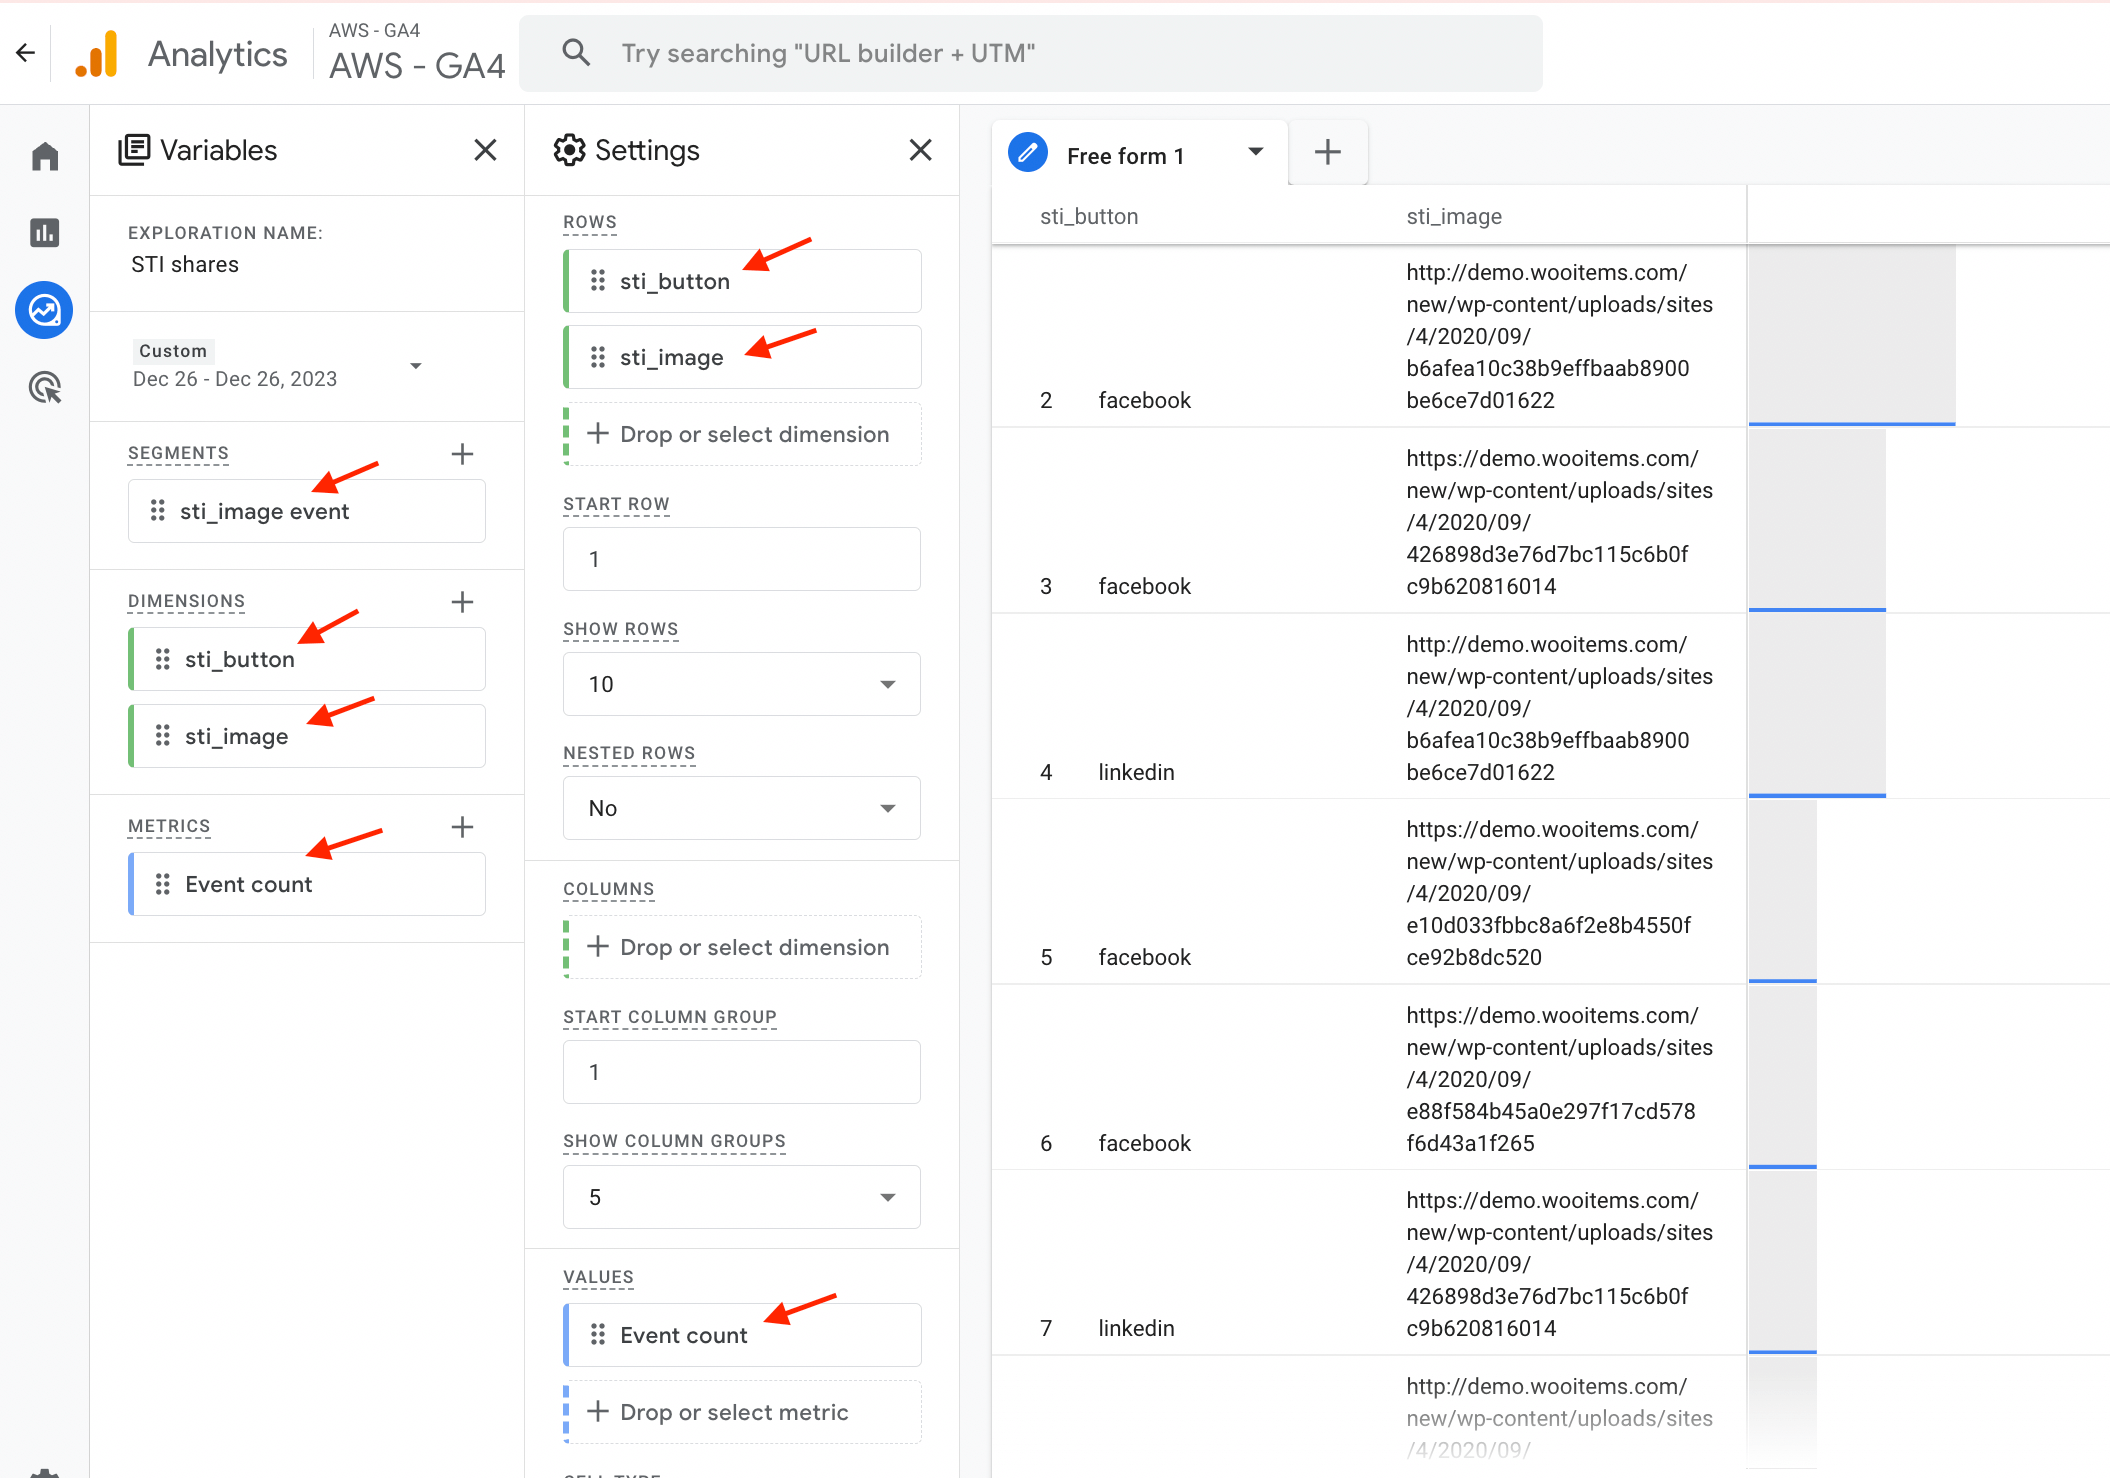
GA4 image shares events report
Custom analytics events
Additionally you can track your sharing data inside any other analytics tools ( or send any other additional events to GA ). This can be done with the help of stiAnalytics js event that is triggered after any image sharing event.
Note: This event is triggered even if Google Analytics option is turned off.
Example - let's send an additional event my_custom_sti_event with parameters about sharing button and image to our GA4 instance.
1. Open the functions.php file in your child theme or use any plugin for adding custom code snippets.
2. Add the following php code snippet:
add_action( 'wp_footer', function () { ?>
    <script>
        jQuery(document).on('stiAnalytics', function (e) {

            window.dataLayer.push({
                'event' : 'my_custom_sti_event',
                'custom_param_1': e.detail.button,
                'custom_param_2': e.detail.image
            });

        });
    </script>
    <?php
}, 100 );
this code will send my_custom_sti_event event with custom parameters custom_param_1 and custom_param_2 to your GA4 property.
Customize this code any way that you want. For example - use it to send data about users shares to other analytics tools.
Custom data available with this code:
e.detail.button - current sharing button name
e.detail.image - URL of shared image
Old Google Analytics ( prior to GA4 )
To view sharing events go to your GA account and open Behavior -> Events tab.
Plugin events will have the following parameters:
Event Category = STI click
Event Action = {social button name}
Event Label = {shared image URL}
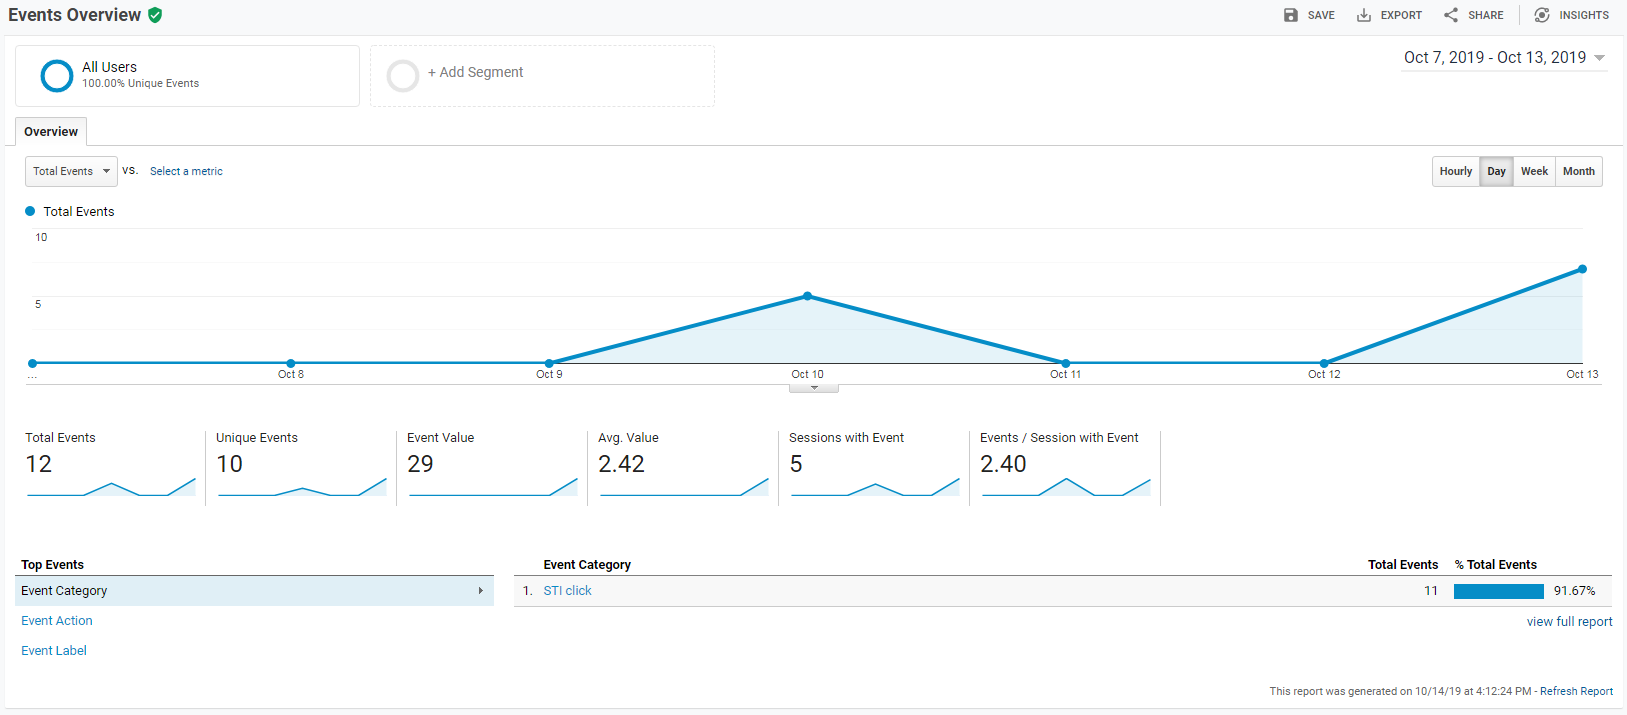
Google Analytics dashboard
Don't forget that Google Analytics has some delay between action and its display on GA dashboard.